To get started let’s make a new folder named amazon-clone and open it. As soon as you are in the folder, right click and select Open With Code
After you click Open with Code you’ll see a huge weird window. Don’t worry we got you covered. This is what you might be seeing:
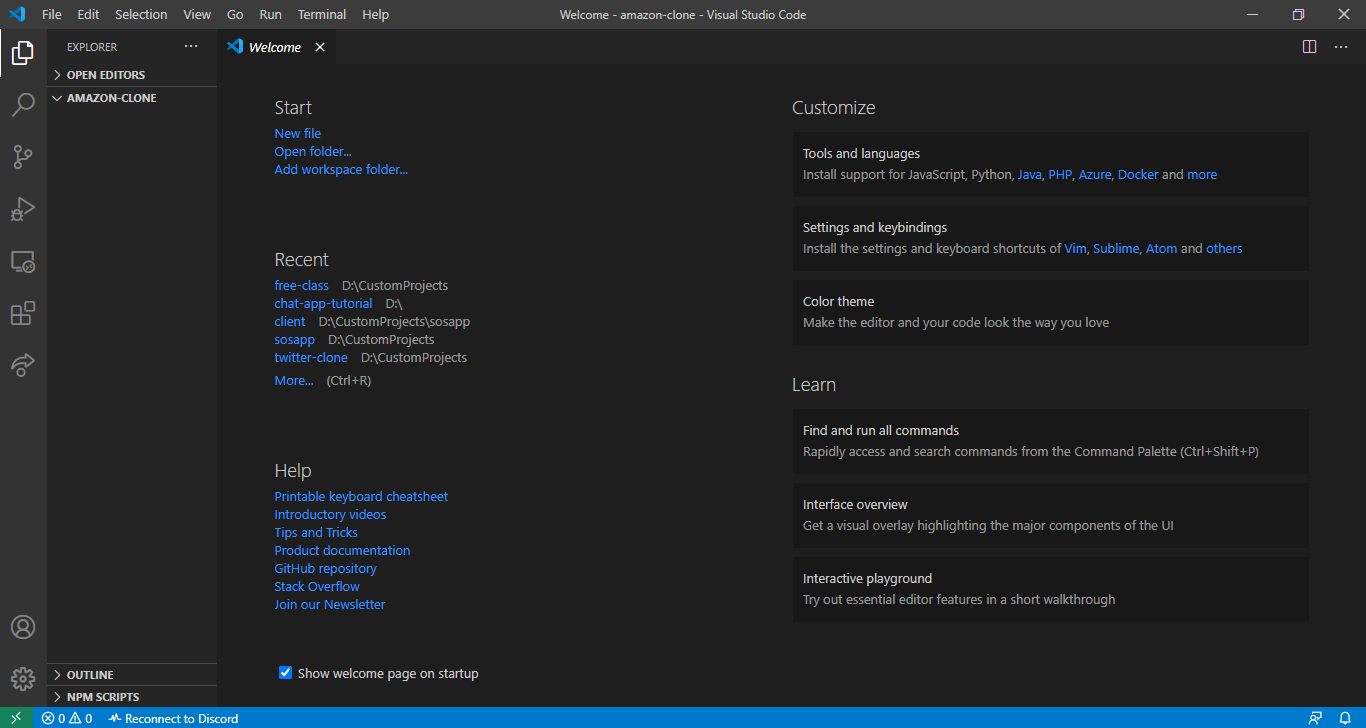
So Visual Studio Code is the Code Editor we are going to use, this is what professionals mostly use, but this is more of a personal preference. You can use Atom or any other editor too, but Visual Studio Code makes your life easier.
Now that in you are in Visual Studio Code, Press Ctrl + J (on Windows) and Command + J (on Mac) and you should see a terminal window at the bottom just like shown below.

Don’t freak out, this is just a regular terminal, we are not hacking anything 😆
Now that you’re in the terminal, we can now install and setup React app. And this is usually a headache when doing manually. So Facebook, the creator of React made a script which installs and sets up React for you without any type of headache.
To use this script, just type the following in the terminal and press Enter. This will take time so till then you can read what the script actually does below.
npx create-react-app .
Here’s how this works. npx is a part of npm (Node Package Manager) except npx runs a remote script instead of installing it locally. This is done so that you always have the latest version of React installed in your project. create-react-app is the name of the remote script and “.” specifies that we want the script to make a React project in the SAME FOLDER and not make a new folder for it, if you had to make a new folder name, you could just provide the name of folder instead of “.” and it would make a folder for you.
You know that it is finished when you see “Happy Hacking” on your terminal. If you see this, we are ready to move on.
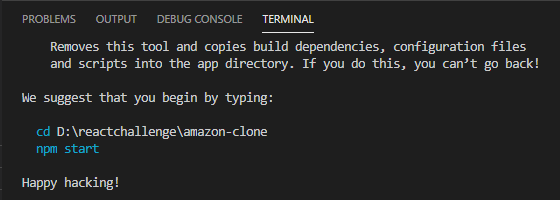
Now that we have our React App installed, now we can start it. In the terminal type the following command. This command will start the React App.
npm start
After you hit Enter, you should see your default browser open. Although I suggest Google Chrome because of it’s development tools making life easier, it’s still your personal preference, but we cannot guarantee development quality with other browsers.
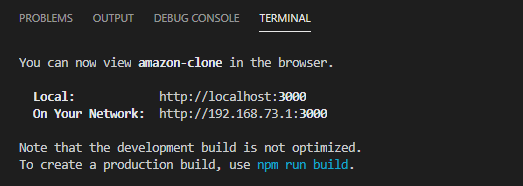
If you did everything correct, you must see the following screen on your browser window.
If you do not see the browser tab open
http://localhost:3000
then go to above URL or even better, I’ve something for you. This will take you to your app.
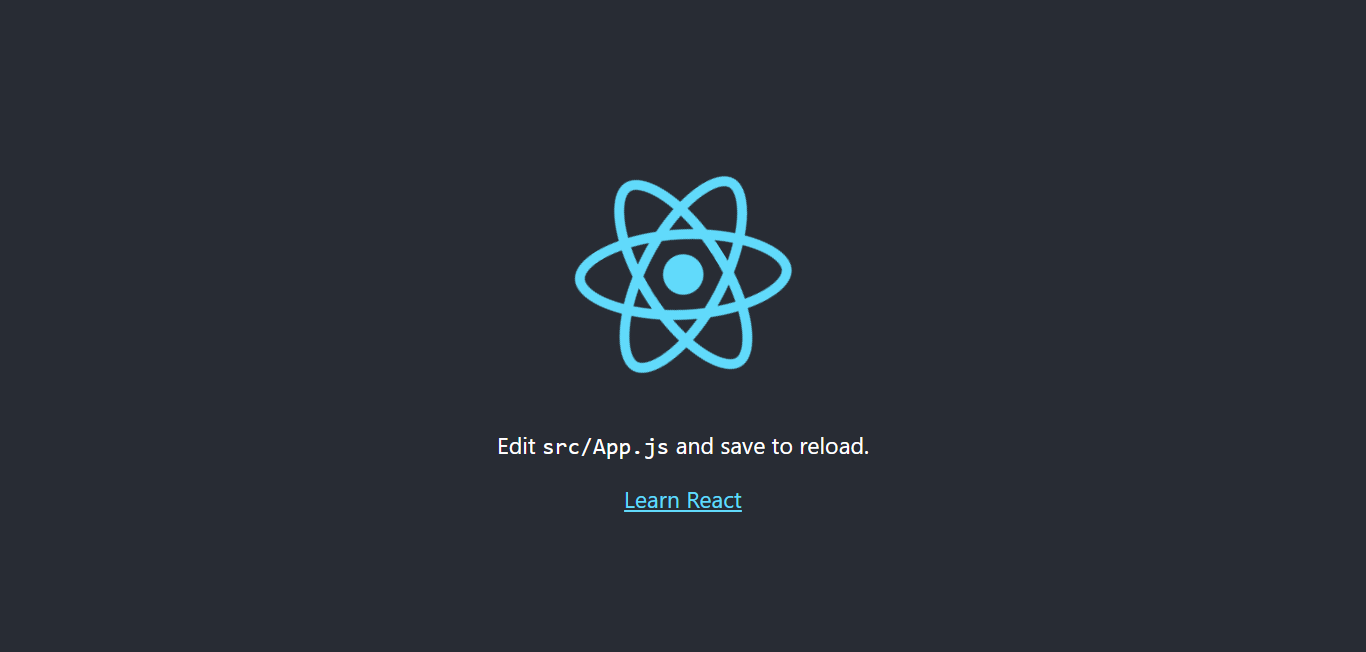
This is the Welcome screen of React. But we want to build an Amazon Clone, so we need to clean up our React project a bit so that we can get started with the Amazon clone.
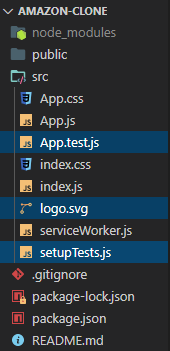
Delete (optional) three files from the src folder from the React App. Those three files are
- App.test.js
- logo.svg
- setupTests.js
We are deleting these files because these are not relevant to us in any project.
That’s not all, if you check the browser window now, I know what you’re seeing, do not freak out, we have the solution, go to App.js and remove the following line from code.
import logo from “./logo.svg”;
Also remove everything under the first <div> element from your App.js file. You’re code should look like the following:
 import React from “react”;
 import “./App.css”;

function App() {
 return <div className=”app”>React App</div>;
}

export default App;
Now let’s cleanup the CSS files a bit.
Go to App.css and remove all the contents of your file.
Now go to index.css and add this piece of code on the top. And look at the change on the app. What do you see?
*{
 margin: 0;
 padding: 0;
}
This will get rid of the margin and padding of the page.
Now we have our React project perfectly set up. Now we can start making the Amazon Clone.
1. Setting up the React Router
A very important thing to consider in a React app is the navigation (moving from one page to another) of the users. Since React is a single page application, it doesn’t support multiple routes by default.
But the node packages come to our save. There’s a package named react-router-dom which allows us to create routes for our React project. Not a lot complicated. Setting up is one time, and then whenever you add a new page, you just need to inform the Router. Don’t worry we will cover that in depth here!
Open your terminal and enter the following command to install react-router-dom
npm install react-router-dom
When the installation completes, you should see something like this

Once it’s installed, now let’s get our hands dirty and write some actual code. Let’s make a new component. To make a component, simple make a new file. We call it Home.js for our case. The convention is that the first letter of a component must be in capitals. Also create a Home.css file for the component styling.
Also to make life easier, go ahead and install a Visual Studio Code extension named ES7 React/Redux/GraphQL/React-Native snippets. This extension will make the boiler plate for React components without you being typing the code all by yourself.
Let’s go in Home.js. Just type in “rfce” and you should get an option to autocomplete the snippets as shown in following picture.
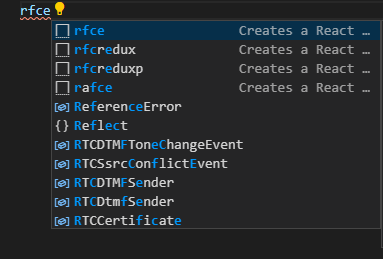
Hit Enter while on “rfce”. This will autocomplete the React boiler plate for you. Now let’s change the class of the div element provided us to “home”. We follow BEM convention while styling our components.
BEM Convention helps our CSS and JSX organized for us to read later, and everything becomes easy to keep track of.
Let’s just add some text there for now, let’s say Hello. The code on the Home.js file now should be
import React from "react";

function Home() {
 return <div className="home">Hello</div>;
}

export default Home;
If you see the browser, you will not see anything because we haven’t prepared our entry point App.js yet. So let’s open the file and start setting up the React Router. First of all, we need to import the dependencies. Import them using the following code at the top of App.js
import { BrowserRouter as Router, Route, Switch } from "react-router-dom";Once you’ve done importing the code, you can now use React Router in your file. Now that we have imported React Router, let’s configure React Router according to our needs. Use the below code in your App.js.
import React from "react";
import "./App.css";
import { BrowserRouter as Router, Route, Switch } from "react-router-dom";
import Home from "./Home";

function App() {
return (
<div className="app">
<Router>
<Switch>
<Route path="/">
<Home />
</Route>
</Switch>
</Router>
</div>
);
}

export default App;
Now you can see Hello on the screen. Don’t worry, we are now running over the code to see what we have done.
- Our motive is to have Home component to be rendered on the default route that is “/”.
- To use the Home component, we need to import it, so we imported it at the top.
- We need to wrap the entire app into the Router component, so that every component is a part of Router and has access to the Router.
- The switch specifies that the components beneath it are to be rendered only under certain routes. So if a route is meant for “/”, you cannot see the information on “/hello” route.
- The Route component is used under the Switch component. The Route component specifies the rules of the Routes and components to render at specific route. For example in this case we have the Home component render at “/” route. We will be adding more routes to this.
We now have the Router set up. Let’s go ahead and make the Amazon Navbar.
2. Creating the Navbar
I hope you guys are still pumped because now we are going to do some real cloning stuff! I’m pumped for this.
We are going to use a package for icons, and we need Material Icons to use them. So open your terminal and write the following command.
npm install @material-ui/core @material-ui/icons
Once you installed the dependencies, you can use it to display SVG icons which are provided by Material UI. Material UI is a very popular UI library for React which has a lot of prebuilt components just as icons which makes life easier.
So enough talking, let’s get back to code. Now let’s make a new component called Header.js and let’s make a new file and call it Header.css just as we did with the home component. In each component, we will follow the same steps
We have to initialize the component boiler plate using “rfce” and follow the BEM convention and include the CSS file and update the class names.
We have the component ready. Before we actually start designing it, we need to include it in Router so that we can actually display it. In App.js where you mentioned Route for “/” route, let’s include the Header component in it too. Your updated route should look like this
<Route path="/">
  <Header />
  <Home />
</Route>
Remember you place Navbar before the Home component, because the Amazon Navbar is always at the top.
Now finally let’s get back to Header.js and start setting up the layout of our classic Amazon Navbar. The code in your Header.js should look like this. We would go through the entire code after the code block.
import React from "react";
import "./Header.css";
import SearchIcon from "@material-ui/icons/Search";
import ShoppingBasketIcon from "@material-ui/icons/ShoppingBasket";

function Header() {
  return (
    <div className="header">

        <img
          className="header__logo"
          src="http://pngimg.com/uploads/amazon/amazon_PNG11.png"
        />


      <div className="header__search">
        <input className="header__searchInput" type="text" />
        <SearchIcon className="header__searchIcon" />
      </div>

      <div className="header__nav">

          <div className="header__option">
            <span className="header__optionLineOne">Hello Guest</span>
            <span className="header__optionLineTwo">Sign In</span>
          </div>


          <div className="header__option">
            <span className="header__optionLineOne">Returns</span>
            <span className="header__optionLineTwo">& Orders</span>
          </div>


        <div className="header__option">
          <span className="header__optionLineOne">Your</span>
          <span className="header__optionLineTwo">Prime</span>
        </div>


          <div className="header__optionBasket">
            <ShoppingBasketIcon />
            <span className="header__optionLineTwo header__basketCount">
              0
            </span>
          </div>

      </div>
    </div>
  );
}

export default Header;
Before moving on to tearing this apart on what’s exactly going on, let’s just also grab the Header.css file so that the styling part is done.
.header {
  height: 60px;
  display: flex;
  align-items: center;
  background-color: #131921;
  position: sticky;
  top: 0;
  z-index: 100;
}

.header__logo {
  width: 100px;
  object-fit: contain;
  margin: 0 20px;
  margin-top: 18px;
}

.header__search {
  display: flex;
  flex: 1;
  align-items: center;
  border-radius: 24px;
}

.header__searchInput {
  height: 12px;
  padding: 10px;
  border: none;
  width: 100%;
}

.header__searchIcon {
  padding: 5px;
  height: 22px !important;
  background-color: #cd9042;
}

.header__optionLineOne {
  font-size: 10px;
}

.header__optionLineTwo {
  font-size: 13px;
  font-weight: 800;
}

.header__optionBasket {
  display: flex;
  align-items: center;
  color: white;
}

.header__basketCount {
  margin-left: 10px;
  margin-right: 10px;
}

.header__nav {
  display: flex;
  justify-content: space-evenly;
}

.header__option {
  display: flex;
  flex-direction: column;
  margin-left: 10px;
  margin-right: 10px;
  color: white;
}
Now the time to tear apart what we are exactly doing in the above two gigantic pieces of code
- We made a Navbar for Amazon Clone. In the first code block we laid out the layout. It’s just like basic HTML but in React we call it JSX.
- We set up that we want the Amazon logo at the left, the search bar at the center, and the other options at right which we then make happen with our CSS files
- We have used Material UI icons in the Navbar too, like the Search Icon and the Basket icons, they were imported from the Material UI Icons package.
- In the CSS, we basically set the display property of the Navbar to flex so that the items align next to each other, we changed the background colors, we tweaked the search box and then we styled the options.
Once you’ve done this, you will see a Navbar like this

Awesome we have the Navbar ready. If you are still pumped up, which you should be, get ready for the building for the Homepage for the Amazon Clone!
3. Creating the Amazon Homepage
As of now, we have the Navbar design ready and it is same as Amazon! Let’s now work on the actual homepage of Amazon. This is going to be interesting. We are going to work with two components in this section. So without wasting any time, let’s go right into it!
We already made the Home component which is rendered by default because we configured it to be rendered it on default route “/” in the React Router. Now let’s go and do something creative in the Home component.
Open your Home.js and let’s start laying out our layout! We will start with the image which Amazon shows at the top of its landing page.
import React from "react";
import "./Home.css";

function Home() {
  return (
    <div className="home">
      <div className="home__container">
        <img
          className="home__image"
          src="https://images-eu.ssl-images-amazon.com/images/G/02/digital/video/merch2016/Hero/Covid19/Generic/GWBleedingHero_ENG_COVIDUPDATE__XSite_1500x600_PV_en-GB._CB428684220_.jpg"
          alt=""
        />
      </div>
    </div>
    );
};

export default Home;
Now let’s style this! Open your Home.css and let’s start styling our Amazon Homepage!
home {
  display: flex;
  justify-content: center;
  margin-left: auto;
  margin-right: auto;
  max-width: 1500px;
}
.home__image {
  width: 100%;
  z-index: -1;
  margin-bottom: -150px;
  mask-image: linear-gradient(to bottom, rgba(0, 0, 0, 1), rgba(0, 0, 0, 0));
}
Once you hit save, you should see the following.
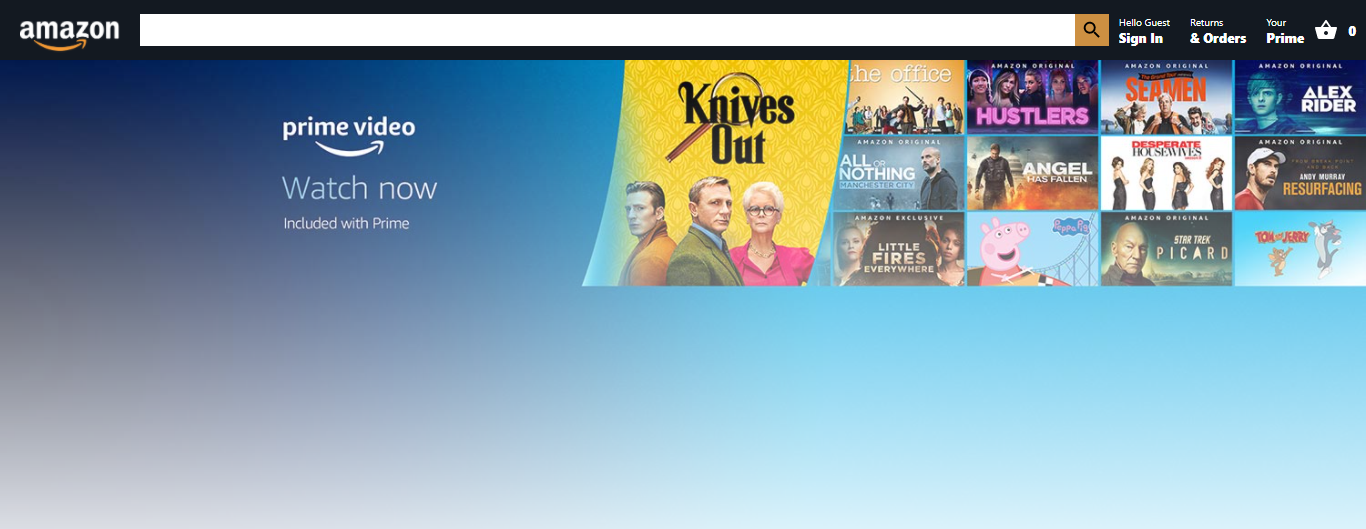
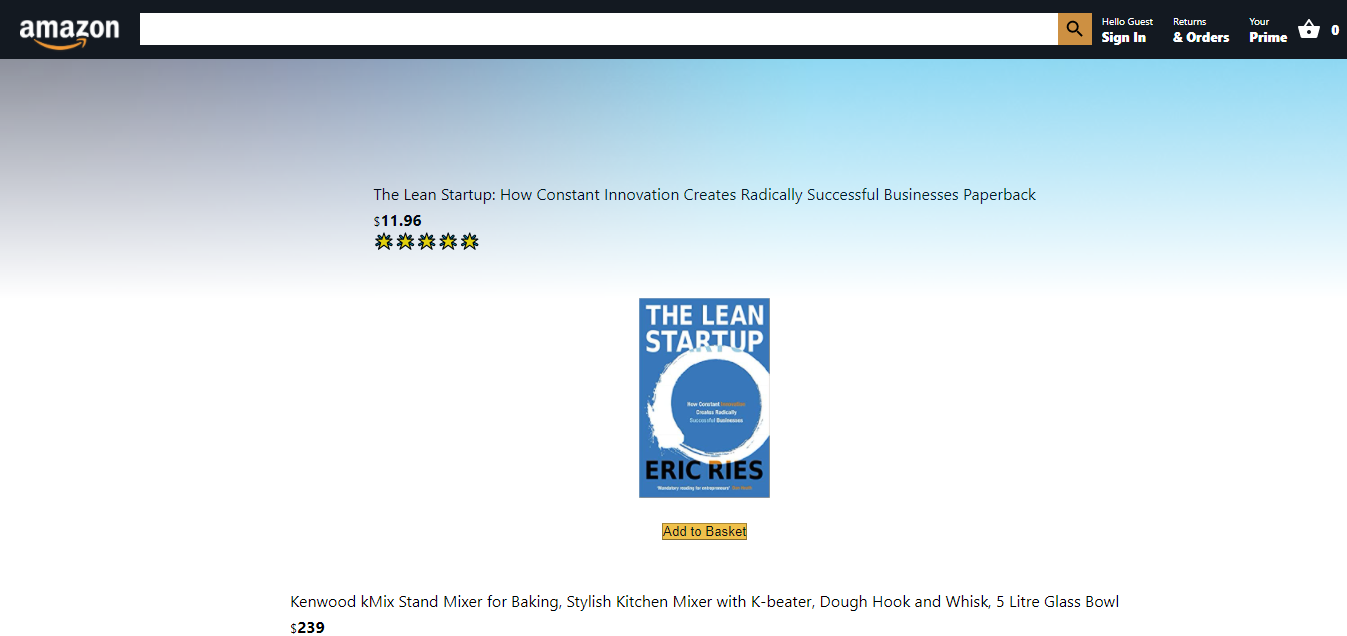
Looks similar to Amazon, right! The party has not ended yet! Let’s add some dummy products to the Homepage to make it more attractive! We will work on the functionality in the later sections.
To display products, we will create a new component name Product. You know the drill, you need to create both the JS and CSS files, you need to follow the BEM convention and update the class name of the component. When you’re all set up, let’s create a layout of the Product component!
import React from "react";
import "./Product.css";

function Product({ id, title, image, price, rating }) {

  return (
    <div className="product">
      <div className="product__info">
        <p>{title}</p>
        <p className="product__price">
          <small>$</small>
          <strong>{price}</strong>
        </p>
        <div className="product__rating">
          {Array(rating)
            .fill()
            .map((_, i) => (
              <p>🌟</p>
            ))}
        </div>
      </div>

      <img src={image} alt="" />

      <button>Add to Basket</button>
    </div>
  );
}

export default Product;
Before diving into the code, let’s get the CSS too! Open Product.css and have this CSS in there.
.product {
  display: flex;
  flex-direction: column;
  align-items: center;
  justify-content: flex-end;
  margin: 10px;
  padding: 20px;
  width: 100%;
  max-height: 400px;
  min-width: 100px;
  background-color: white;
  z-index: 1;
}

.product__rating {
  display: flex;
}

.product > img {
  max-height: 200px;
  width: 100%;
  object-fit: contain;
  margin-bottom: 15px;
}

.product > button {
  background: #f0c14b;
  border: 1px solid;
  margin-top: 10px;
  border-color: #a88734 #9c7e31 #846a29;
  color: #111;
}

.product__price {
  margin-top: 5px;
}

.product__info {
  height: 100px;
  margin-bottom: 15px;
}
So this one is a little hard to understand at the first place, so let’s tear through the code and see exactly what’s happening.
- We are passing some props through the component, which can be used by the components to render. These props are — Product ID, Title, Price, Image, Ratings.
- These props are usually variables and objects that are passed by parent components. We can render props on the screen in this case because all of the props here are viewable. So, we render the data on the screen by enclosing the variables with {} at appropriate places.
- To render the ratings, we use a bit different way here. We create an array of length of the ratings passed and loop through them and render out the star emoji the number of times the ratings passed through the props.
You cannot see the products on the screen yet! You need to place the products on the Homepage of the Amazon Clone, so let’s go back to Home.js and add some code! Your Home.js should look like this
import React from "react";
import "./Home.css";
import Product from "./Product";

function Home() {
  return (
    <div className="home">
      <div className="home__container">
        <img
          className="home__image"
          src="https://images-eu.ssl-images-amazon.com/images/G/02/digital/video/merch2016/Hero/Covid19/Generic/GWBleedingHero_ENG_COVIDUPDATE__XSite_1500x600_PV_en-GB._CB428684220_.jpg"
          alt=""
        />

        <div className="home__row">
          <Product
            id="12321341"
            title="The Lean Startup: How Constant Innovation Creates Radically Successful Businesses Paperback"
            price={11.96}
            rating={5}
            image="https://images-na.ssl-images-amazon.com/images/I/51Zymoq7UnL._SX325_BO1,204,203,200_.jpg"
          />
          <Product
            id="49538094"
            title="Kenwood kMix Stand Mixer for Baking, Stylish Kitchen Mixer with K-beater, Dough Hook and Whisk, 5 Litre Glass Bowl"
            price={239.0}
            rating={4}
            image="https://images-na.ssl-images-amazon.com/images/I/81O%2BGNdkzKL._AC_SX450_.jpg"
          />
        </div>

        <div className="home__row">
          <Product
            id="4903850"
            title="Samsung LC49RG90SSUXEN 49' Curved LED Gaming Monitor"
            price={199.99}
            rating={3}
            image="https://images-na.ssl-images-amazon.com/images/I/71Swqqe7XAL._AC_SX466_.jpg"
          />
          <Product
            id="23445930"
            title="Amazon Echo (3rd generation) | Smart speaker with Alexa, Charcoal Fabric"
            price={98.99}
            rating={5}
            image="https://media.very.co.uk/i/very/P6LTG_SQ1_0000000071_CHARCOAL_SLf?$300x400_retinamobilex2$"
          />
          <Product
            id="3254354345"
            title="New Apple iPad Pro (12.9-inch, Wi-Fi, 128GB) - Silver (4th Generation)"
            price={598.99}
            rating={4}
            image="https://images-na.ssl-images-amazon.com/images/I/816ctt5WV5L._AC_SX385_.jpg"
          />
        </div>

        <div className="home__row">
          <Product
            id="90829332"
            title="Samsung LC49RG90SSUXEN 49' Curved LED Gaming Monitor - Super Ultra Wide Dual WQHD 5120 x 1440"
            price={1094.98}
            rating={4}
            image="https://images-na.ssl-images-amazon.com/images/I/6125mFrzr6L._AC_SX355_.jpg"
          />
        </div>
      </div>
    </div>
  );
}

export default Home;
.home__row {
  display: flex;
  z-index: 1;
  margin-left: 5px;
  margin-right: 5px;
}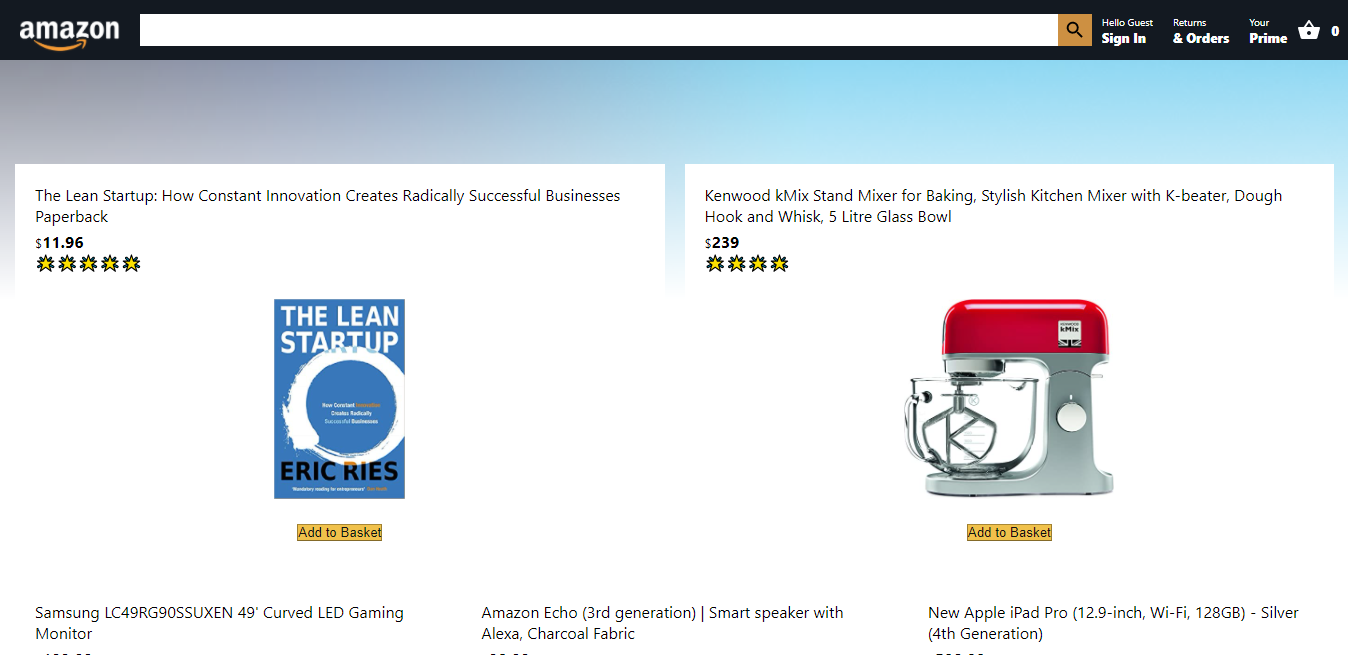
But there’s still something to be taken care of! The white spaces between the Products! Let’s go ahead and fix them! Let’s go to index.css and change the background color of the app! Your index.css should look like this.
Now, if you save and return the browser, you should see the white space has been disappeared because we just changed the background color!
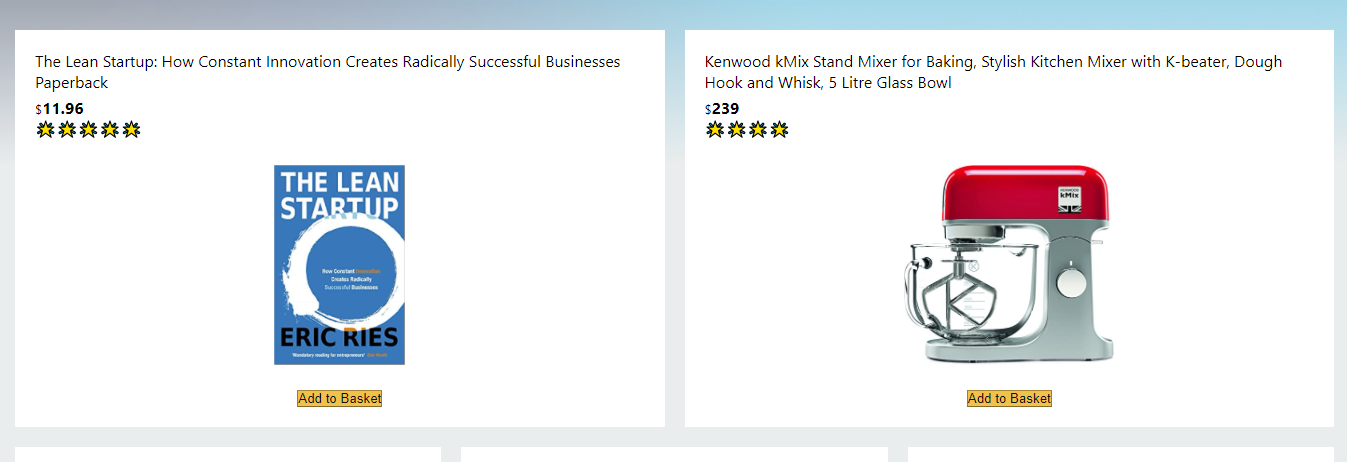
Now that our Homepage is working, now we can move over to some interesting stuff, the React Context API. It is a application level state management so that you can access important data from any component when necessary.
4. Setting up React Context API
The Context API is a very important part of React. It helps us to make application level states and we can get the data from those states through any component. There are many alternatives, one of them is Redux. But I highly recommend you should start off with React Context API.
Setting up React Context API is more of a boiler plate. Things won’t make sense at first but once you practice, things will automatically start making sense.
So let’s make a file named StateProvider.js and have these contents
import React, { createContext, useContext, useReducer } from "react";

// Prepares the dataLayer
export const StateContext = createContext();

// Wrap our app and provide the Data layer
export const StateProvider = ({ reducer, initialState, children }) => (
  <StateContext.Provider value={useReducer(reducer, initialState)}>
    {children}
  </StateContext.Provider>
);

// Pull information from the data layer
export const useStateValue = () => useContext(StateContext);
Do not worry looking at this code. As I mentioned earlier, setting up React Context API is more of a boilerplate and pretty much same in every project.
Now let’s make a file name reducer.js here’s where you will define all of your application level states and define actions to make changes to the state.
export const initialState = {
  basket: [],
  user: null
};

// Selector
export const getBasketTotal = (basket) =>
  basket?.reduce((amount, item) => item.price + amount, 0);

const reducer = (state, action) => {
  console.log(action);
  switch (action.type) {
    default:
      return state;
  }
};

export default reducer;
Let’s see what’s happening in this piece of code.
- The reducer is a place where you declare all the application level states which can be used later by the application.
- In initialState, we declare the states we are going to use. In this case, basket and user. We would cover them in future sections.
- The actual reducer function takes in a state and action. The state and action is provided so that the reducer can perform operations on the state.
- We export the reducer.
We haven’t done yet! We need to use this reducer to manage our application level state. To do so, let’s introduce everything in the index.js. After the modifications, your index.js should look like this.
import React from "react";
import ReactDOM from "react-dom";
import "./index.css";
import App from "./App";
import * as serviceWorker from "./serviceWorker";
import reducer, { initialState } from "./reducer";
import { StateProvider } from "./StateProvider";

ReactDOM.render(
  <React.StrictMode>
    <StateProvider initialState={initialState} reducer={reducer}>
      <App />
    </StateProvider>
  </React.StrictMode>,
  document.getElementById("root")
);

// If you want your app to work offline and load faster, you can change
// unregister() to register() below. Note this comes with some pitfalls.
// Learn more about service workers: https://bit.ly/CRA-PWA
serviceWorker.unregister();
So let’s see what happens here.
We import few things — reducer and initialState from reducer.js and then we import the StateProvider component from the StateProvider.js.
We enclose the App component with StateProvider so that children get access to the states too.
We pass in the reducer and initialState to the StateProvider.
Now the State knows what is the initial state and which reducer too.
I know this was a bit more boring because this was mostly a boiler plate. But from next section, we are actually going to use it so that we can store the basket and user information in it so that any component can access the information.
Keep your energy high, we have a lot to do!
5. Adding the Basket functionality
Now that we have the React Context API along with the reducer set up, now we can add the Add to Basket functionality!
So basically, we need to import the state whenever we feel the need and we can dispatch events. We will go in depth about that in this section.
To start with things, let’s go to our Product.js and add the Add to Basket functionality.
First of all, we import the state and dispatch using useStateValue() hook and then it’s all easy to work with stuff, so let’s import it. Add this to the top of Product.js
import { useStateValue } from "./StateProvider";Well done! Now you can use the hook! So go beneath the Product component itself and add this code.
const [{ basket }, dispatch] = useStateValue();
So this means two things, we are using the useStateValue hook to
- Bring in a state named basket
- And we are also getting the dispatch function which allows us to dispatch actions to change the state in the reducer.
Now that we have everything we require to add item to basket, let’s actually perform the code to add the item to basket.
Your updated Product.js should look like this
import React from "react";
import "./Product.css";
import { useStateValue } from "./StateProvider";

function Product({ id, title, image, price, rating }) {
  const [{ basket }, dispatch] = useStateValue();

  const addToBasket = () => {
    // dispatch the item into the data layer
    dispatch({
      type: "ADD_TO_BASKET",
      item: {
        id: id,
        title: title,
        image: image,
        price: price,
        rating: rating,
      },
    });
  };

  return (
    <div className="product">
      <div className="product__info">
        <p>{title}</p>
        <p className="product__price">
          <small>$</small>
          <strong>{price}</strong>
        </p>
        <div className="product__rating">
          {Array(rating)
            .fill()
            .map((_, i) => (
              <p>🌟</p>
            ))}
        </div>
      </div>

      <img src={image} alt="" />

      <button onClick={addToBasket}>Add to Basket</button>
    </div>
  );
}

export default Product;
Let’s see what we’ve changed here.
- First of all, we set an onClick on the button. Once the button is clicked, addToBasket function will fire off.
- The addToBasket function fires off the dispatch to the reducer instructing to update the state with the provided data. Here the type is “ADD_TO_BASKET” which we will define in the reducer in a bit. We are dispatching the action along with its data.
Now let’s go to the reducer and define the action and define what it exactly does. Your reducer.js should look like this, we will run through the code after the code block.
export const initialState = {
  basket: [],
  user: null
};

// Selector
export const getBasketTotal = (basket) =>
  basket?.reduce((amount, item) => item.price + amount, 0);

const reducer = (state, action) => {
  console.log(action);
  switch (action.type) {
    case "ADD_TO_BASKET":
      return {
        ...state,
        basket: [...state.basket, action.item],
      };
    default:
      return state;
  }
};

export default reducer;
Okay so let’s see what’s happening here.
- We are adding an action type to the switch case, we call it “ADD_TO_BASKET”
- We set the state, we update the basket, but here we use the spread operator (…) so that previous state is not lost. And that’s how we add items to the basket array in our state in reducer.
Now let’s update the Navbar to show the number of items currently present in the basket. So let’s go to Header.js and start coding!
We replace the hardcoded 0 in the basket part of the Header component, and now your code should look like this
import React from "react";
import "./Header.css";
import SearchIcon from "@material-ui/icons/Search";
import ShoppingBasketIcon from "@material-ui/icons/ShoppingBasket";
import { Link } from "react-router-dom";
import { useStateValue } from "./StateProvider";

function Header() {
  const [{ basket, user }, dispatch] = useStateValue();

  return (
    <div className="header">
      <Link to="/">
        <img
          className="header__logo"
          src="http://pngimg.com/uploads/amazon/amazon_PNG11.png"
        />
      </Link>

      <div className="header__search">
        <input className="header__searchInput" type="text" />
        <SearchIcon className="header__searchIcon" />
      </div>

      <div className="header__nav">

          <div className="header__option">
            <span className="header__optionLineOne">Hello Guest</span>
            <span className="header__optionLineTwo">Sign in</span>
          </div>


          <div className="header__option">
            <span className="header__optionLineOne">Returns</span>
            <span className="header__optionLineTwo">& Orders</span>
          </div>


        <div className="header__option">
          <span className="header__optionLineOne">Your</span>
          <span className="header__optionLineTwo">Prime</span>
        </div>

        <Link to="/checkout">
          <div className="header__optionBasket">
            <ShoppingBasketIcon />
            <span className="header__optionLineTwo header__basketCount">
              {basket?.length}
            </span>
          </div>
        </Link>
      </div>
    </div>
  );
}

export default Header;
Let’s list out what new we have introduced in the above piece of code.
- We have brought in the states, and the dispatch functions so that we can dispatch actions to the reducer.
- We removed the hardcoded 0 from the basket and added basket?.length , which will give the number of items in the basket array.
- We set up the links for checkout and home. This is because we will need them in the next section itself! Link component comes with react-router-dom so that we can link to routes without reloading pages! Interesting!
After this, if you add items to the basket, you should see your basket updating like this.

Now that we have basket ready, now let’s get our hands dirty with Firebase and set up authentication and database! We will learn that in the next section in this article.
6. Setting up Firebase
So let’s prepare our database and authentication before we even work on them. We will be using Firebase. Go to https://firebase.google.com and log into your Google account.
Now let’s see how do you set up your project. Once you’re in the Firebase console, follow the following steps.
- Click on “Add Project”
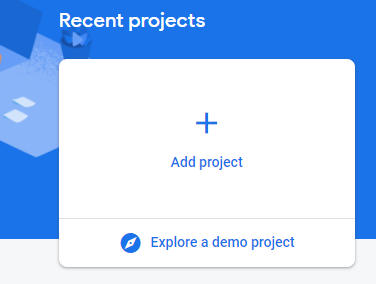
- Give your project a name, it can be any name!
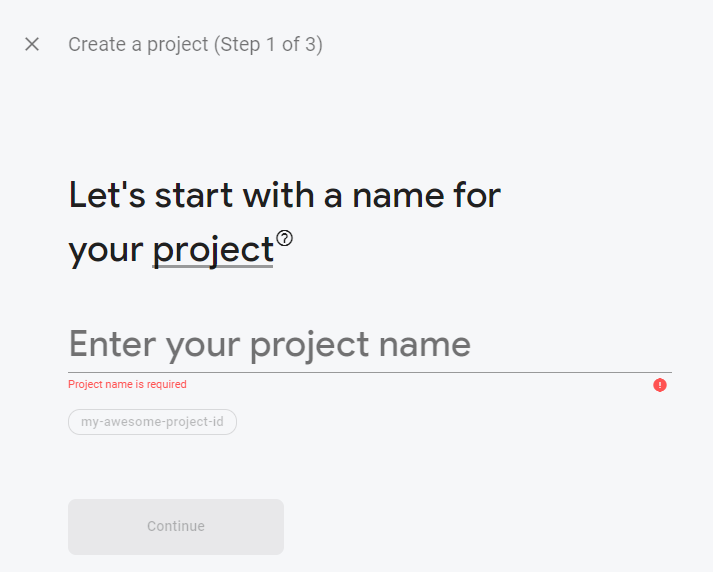
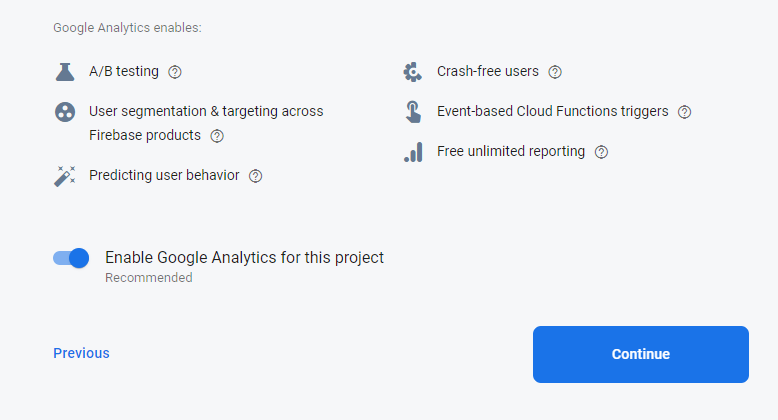
- It doesn’t matter if you turn on Google Analytics for the project, it will make no difference. But in this case, we will just enable it.
- Once you see the below image, your Firebase project is created. Click on continue.
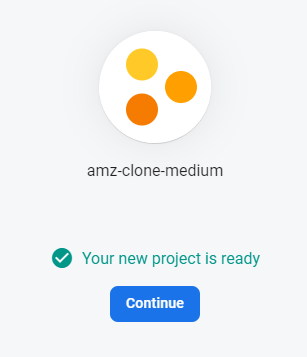
Well done! Now let’s set this project up according to our needs.
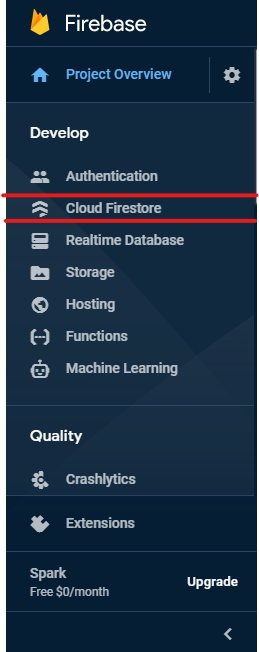
- From the right panel, select Cloud Firestore
- The Cloud Firestore is the database for Firebase.
- Click on Create Database.
- Select Start in Test Mode.
- Click Enable and wait for Google to provision you Cloud Firestore.
- Your database is made.
Let’s now set up authentication!
- Select Authentication from the side panel.
- Select Set up sign-in method.
- Click on the pencil icon near Email/Password

- Enable it and click on Save.

Now click on Settings icon on the side panel and select Project Settings so that we can setup this Firebase project with our React project.
- Click on the third icon (Web) at the bottom

- Enter the project name and remember to select Also setup Firebase Hosting.
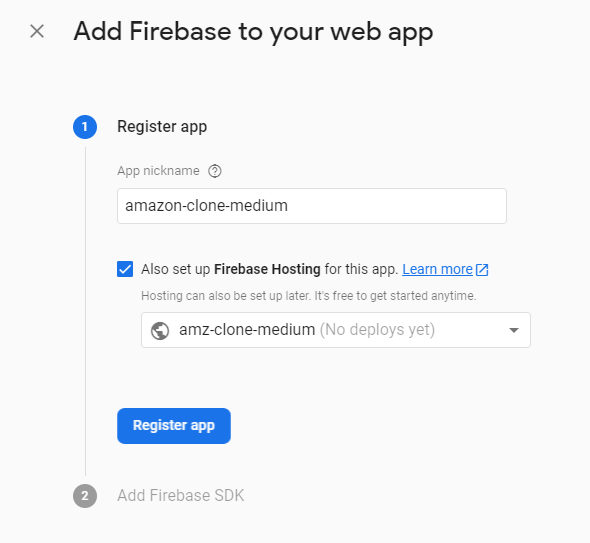
- Hit Next until you’re back into your Firebase project.
- Now, let’s go back to the React app to install dependencies named firebase and firebase-tools
npm install -g firebase-tools && npm install firebase && firebase login
- This will install both the dependencies for you. Also it will ask you to log into your Google Account so that you can use Firebase tools. In the mean time let’s go back to Firebase, and select the config option.
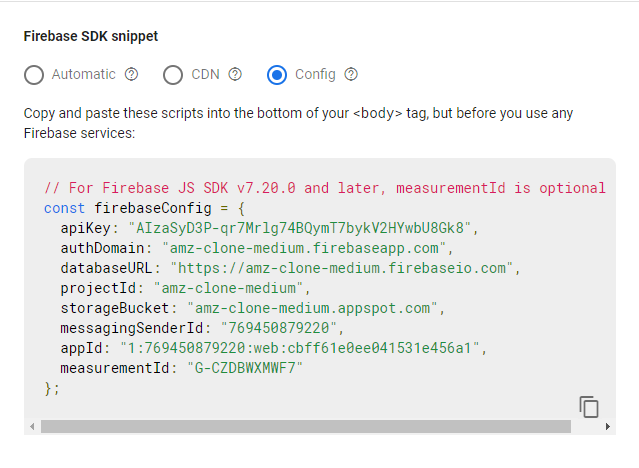
- Copy the entire config and then go back to Visual Studio Code, make a new file named firebase.js and paste it.
- Let’s make the use of the firebase package we just installed through npm and let’s edit the firebase.js file so that we can use authentication and the database from your project.
import firebase from "firebase";

const firebaseConfig = {
  apiKey: "AIzaSyD3P-qr7Mrlg74BQymT7bykV2HYwbU8Gk8",
  authDomain: "amz-clone-medium.firebaseapp.com",
  databaseURL: "https://amz-clone-medium.firebaseio.com",
  projectId: "amz-clone-medium",
  storageBucket: "amz-clone-medium.appspot.com",
  messagingSenderId: "769450879220",
  appId: "1:769450879220:web:cbff61e0ee041531e456a1",
  measurementId: "G-CZDBWXMWF7",
};

const firebaseApp = firebase.initializeApp(firebaseConfig);

const db = firebaseApp.firestore();
const auth = firebase.auth();

export { db, auth };- Remember to use your own config with this!
- In this code, we initialize a Firebase app with the config.
- We get database and authentication from your Firebase Project and export these objects so that we can use them anywhere.
That’s all with the setup for Firebase! Now let’s go ahead and setup authentication for this beautiful Amazon Clone.
I hope you’re still pumped because we have some interesting juicy stuff coming up soon!
7. Setting up Authentication
If you’re still here, you’re still pumped up for this and there’s some really cool stuff, just like in this section we will be covering Authentication using Firebase. So without wasting any time, let’s get back to coding!
Let’s create a new component, named Login. Now you know the drill! Create two new files, Login.js and Login.css and follow the BEM Convention!
Let’s setup layout for the Login component. So open Login.js and get the below layout!
import React, { useState } from 'react';
import './Login.css'
import { Link, useHistory } from "react-router-dom";
import { auth } from "./firebase";

function Login() {

    const [email, setEmail] = useState('');
    const [password, setPassword] = useState('');

    return (
        <div className='login'>
            <Link to='/'>
                <img
                    className="login__logo"
                    src='https://upload.wikimedia.org/wikipedia/commons/thumb/a/a9/Amazon_logo.svg/1024px-Amazon_logo.svg.png'
                />
            </Link>

            <div className='login__container'>
                <h1>Sign-in</h1>

                <form>
                    <h5>E-mail</h5>
                    <input type='text' value={email} onChange={e => setEmail(e.target.value)} />

                    <h5>Password</h5>
                    <input type='password' value={password} onChange={e => setPassword(e.target.value)} />

                    <button type='submit' className='login__signInButton'>Sign In</button>
                </form>

                <p>
                    By signing-in you agree to the AMAZON FAKE CLONE Conditions of Use & Sale. Please
                    see our Privacy Notice, our Cookies Notice and our Interest-Based Ads Notice.
                </p>

                <button className='login__registerButton'>Create your Amazon Account</button>
            </div>
        </div>
    )
}

export default Login
Before we tear apart this code, let’s go to the Login.css and add styling to it!
.login {
    background-color: white;
    height: 100vh;
    display: flex;
    flex-direction: column;
    align-items: center;
}

.login__logo {
    margin-top: 20px;
    margin-bottom: 20px;
    object-fit: contain;
    width: 100px;
    margin-right: auto;
    margin-left: auto;
  }

.login__container {
    width: 300px;
    height: fit-content;
    display: flex;
    flex-direction: column;
    border-radius: 5px;
    border: 1px solid lightgray;
    padding: 20px;
}

.login__container > h1 {
    font-weight: 500;
    margin-bottom: 20px;
  }

.login__container > form > h5 {
    margin-bottom: 5px;
}

.login__container > form > input {
    height: 30px;
    margin-bottom: 10px;
    background-color: white;
    width: 98%;
  }

.login__container > p {
    margin-top: 15px;
    font-size: 12px;
}

.login__signInButton {
    background: #f0c14b;
    border-radius: 2px;
    width: 100%;
    height: 30px;
    border: 1px solid;
    margin-top: 10px;
    border-color: #a88734 #9c7e31 #846a29;
  }

  .login__registerButton {
    border-radius: 2px;
    width: 100%;
    height: 30px;
    border: 1px solid;
    margin-top: 10px;
    border-color: darkgray;
  }
So here’s how the Login component works
We have two local states which keep the track of the values of the textboxes
Whenever the value of the textboxes change, we change the value of state
But you cannot visit the page yet! You need to add it to React Router and update the Navbar!
Go to App.js and enter this route before the main “/” route.
<Route path="/login">
  <Login />
</Route>
Now go to Header.js and use the content.
import React from "react";
import "./Header.css";
import SearchIcon from "@material-ui/icons/Search";
import ShoppingBasketIcon from "@material-ui/icons/ShoppingBasket";
import { Link } from "react-router-dom";
import { useStateValue } from "./StateProvider";
import { auth } from "./firebase";

function Header() {
  const [{ basket, user }, dispatch] = useStateValue();

  const handleAuthenticaton = () => {
    if (user) {
      auth.signOut();
    }
  }

  return (
    <div className="header">
      <Link to="/">
        <img
          className="header__logo"
          src="http://pngimg.com/uploads/amazon/amazon_PNG11.png"
        />
      </Link>

      <div className="header__search">
        <input className="header__searchInput" type="text" />
        <SearchIcon className="header__searchIcon" />
      </div>

      <div className="header__nav">
        <Link to={!user && '/login'}>
          <div onClick={handleAuthenticaton} className="header__option">
            <span className="header__optionLineOne">Hello {!user ? 'Guest' : user.email}</span>
            <span className="header__optionLineTwo">{user ? 'Sign Out' : 'Sign In'}</span>
          </div>
        </Link>

        <Link to='/orders'>
          <div className="header__option">
            <span className="header__optionLineOne">Returns</span>
            <span className="header__optionLineTwo">& Orders</span>
          </div>
        </Link>


        <div className="header__option">
          <span className="header__optionLineOne">Your</span>
          <span className="header__optionLineTwo">Prime</span>
        </div>

        <Link to="/checkout">
          <div className="header__optionBasket">
            <ShoppingBasketIcon />
            <span className="header__optionLineTwo header__basketCount">
              {basket?.length}
            </span>
          </div>
        </Link>
      </div>
    </div>
  );
}

export default Header;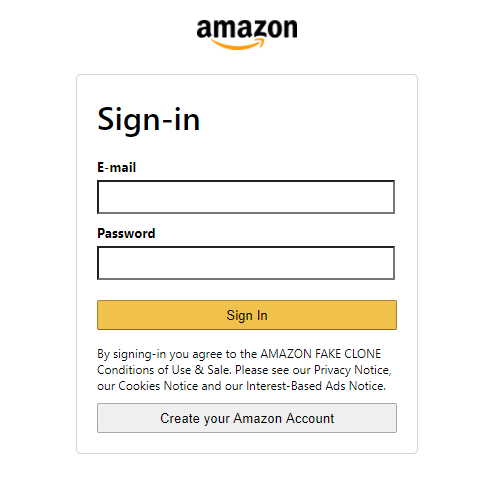
import React, { useState } from 'react';
import './Login.css'
import { Link, useHistory } from "react-router-dom";
import { auth } from "./firebase";

function Login() {
    const history = useHistory();
    const [email, setEmail] = useState('');
    const [password, setPassword] = useState('');

    const signIn = e => {
        e.preventDefault();

        auth
            .signInWithEmailAndPassword(email, password)
            .then(auth => {
                history.push('/')
            })
            .catch(error => alert(error.message))
    }

    const register = e => {
        e.preventDefault();

        auth
            .createUserWithEmailAndPassword(email, password)
            .then((auth) => {
                // it successfully created a new user with email and password
                if (auth) {
                    history.push('/')
                }
            })
            .catch(error => alert(error.message))
    }

    return (
        <div className='login'>
            <Link to='/'>
                <img
                    className="login__logo"
                    src='https://upload.wikimedia.org/wikipedia/commons/thumb/a/a9/Amazon_logo.svg/1024px-Amazon_logo.svg.png'
                />
            </Link>

            <div className='login__container'>
                <h1>Sign-in</h1>

                <form>
                    <h5>E-mail</h5>
                    <input type='text' value={email} onChange={e => setEmail(e.target.value)} />

                    <h5>Password</h5>
                    <input type='password' value={password} onChange={e => setPassword(e.target.value)} />

                    <button type='submit' onClick={signIn} className='login__signInButton'>Sign In</button>
                </form>

                <p>
                    By signing-in you agree to the AMAZON FAKE CLONE Conditions of Use & Sale. Please
                    see our Privacy Notice, our Cookies Notice and our Interest-Based Ads Notice.
                </p>

                <button onClick={register} className='login__registerButton'>Create your Amazon Account</button>
            </div>
        </div>
    )
}

export default Login
Let’s look at some important points here.
- We use e.preventDefault() to prevent the page from reloading because of the form tag.
- When the login button is pressed, the value of the states of textboxes are passed to Firebase to authenticate. Firebase does its magic, and if the authentication is successful returns a promise or throws an error.
- Something similar happens with register. If there is another user with same details, Firebase got you covered.
- The useHistory() is a hook from react-router-dom which helps you to redirect user from the actual code.
Now we need to set a listener to Firebase so that our React app knows that user is authenticated. Just add this useEffect block in App.js
useEffect(() => {
    // will only run once when the app component loads...

    auth.onAuthStateChanged((authUser) => {
      console.log("THE USER IS >>> ", authUser);

      if (authUser) {
        // the user just logged in / the user was logged in

        dispatch({
          type: "SET_USER",
          user: authUser,
        });
      } else {
        // the user is logged out
        dispatch({
          type: "SET_USER",
          user: null,
        });
      }
    });
  }, []);
This will setup the React app if the user is Authenticated, and update the state in the reducer.
Now that authentication is set up, let’s move to the final part, the basket.
This is the final part, but this complete the experience of E-Commerce application! So if you’re pumped up
8. Basket
Now that we have everything set up, making of the basket has to be super easy. But in this, we are going to be making and working with multiple components.
So let’s get into the clone again. Let’s create a component called Checkout. You know the drill as always, make sure to follow the BEM convention, trust me, it makes life easier.
Now, we will make two more components named CheckoutProduct and Subtotal. We would be using these components in out Basket. We could also remove items from cart here.
So let’s make CheckoutProduct first. We would be passing props in so that the component is flexible and can be used anywhere.
import React from 'react';
import './CheckoutProduct.css'
import { useStateValue } from "./StateProvider";

function CheckoutProduct({ id, image, title, price, rating, hideButton }) {
    const [{ basket }, dispatch] = useStateValue();

    const removeFromBasket = () => {
        // remove the item from the basket
        dispatch({
            type: 'REMOVE_FROM_BASKET',
            id: id,
        })
    }

    return (
        <div className='checkoutProduct'>
            <img className='checkoutProduct__image' src={image} />

            <div className='checkoutProduct__info'>
                <p className='checkoutProduct__title'>{title}</p>
                <p className="checkoutProduct__price">
                    <small>$</small>
                    <strong>{price}</strong>
                </p>
                <div className="checkoutProduct__rating">
                    {Array(rating)
                    .fill()
                    .map((_, i) => (
                        <p>🌟</p>
                    ))}
                </div>
                {!hideButton && (
                    <button onClick={removeFromBasket}>Remove from Basket</button>
                )}
            </div>
        </div>
    )
}

export default CheckoutProduct
Let’s give it a little style. Let’s go to CheckoutProduct.css.
.checkoutProduct {
    display: flex;
    margin-top: 20px;
    margin-bottom: 20px;
}

.checkoutProduct__info {
    padding-left: 20px
}

.checkoutProduct__info > button {
    background: #f0c14b;
    border: 1px solid;
    margin-top: 10px;
    border-color: #a88734 #9c7e31 #846a29;
    color: #111;
}

.checkoutProduct__image {
    object-fit: contain;
    width: 180px;
    height: 180px;
  }

.checkoutProduct__rating {
    display: flex;
  }

.checkoutProduct__title {
    font-size: 17px;
    font-weight: 800;
}
Since in this component we have a new reducer command “REMOVE_FROM_BASKET”, let’s add it in reducer.js
export const initialState = {
  basket: [],
  user: null
};

// Selector
export const getBasketTotal = (basket) =>
  basket?.reduce((amount, item) => item.price + amount, 0);

const reducer = (state, action) => {
  console.log(action);
  switch (action.type) {
    case "ADD_TO_BASKET":
      return {
        ...state,
        basket: [...state.basket, action.item],
      };

    case 'EMPTY_BASKET':
      return {
        ...state,
        basket: []
      }

    case "REMOVE_FROM_BASKET":
      const index = state.basket.findIndex(
        (basketItem) => basketItem.id === action.id
      );
      let newBasket = [...state.basket];

      if (index >= 0) {
        newBasket.splice(index, 1);

      } else {
        console.warn(
          `Cant remove product (id: ${action.id}) as its not in basket!`
        )
      }

      return {
        ...state,
        basket: newBasket
      }

    case "SET_USER":
      return {
        ...state,
        user: action.user
      }

    default:
      return state;
  }
};

export default reducer;
Here, we defined the “REMOVE_FROM_BASKET” command for the reducer. This will remove specific product by ID from the Basket.
Now let’s make the second subcomponent Subtotal. So create the component, follow the BEM convention and let’s code the component.
First of all we need to install a package which will make our life easier handling currency formats. So write this in your console.
npm install react-currency-format
import React from "react";
import "./Subtotal.css";
import CurrencyFormat from "react-currency-format";
import { useStateValue } from "./StateProvider";
import { getBasketTotal } from "./reducer";
import { useHistory } from "react-router-dom";

function Subtotal() {
  const history = useHistory();
  const [{ basket }, dispatch] = useStateValue();

  return (
    <div className="subtotal">
      <CurrencyFormat
        renderText={(value) => (
          <>
            <p>
              {/* Part of the homework */}
              Subtotal ({basket.length} items): <strong>{value}</strong>
            </p>
            <small className="subtotal__gift">
              <input type="checkbox" /> This order contains a gift
            </small>
          </>
        )}
        decimalScale={2}
        value={getBasketTotal(basket)} // Part of the homework
        displayType={"text"}
        thousandSeparator={true}
        prefix={"$"}
      />

      <button>Proceed to Checkout</button>
    </div>
  );
}

export default Subtotal;
Let’s go ahead and do the CSS too!
.subtotal {
  display: flex;
  flex-direction: column;
  justify-content: space-between;
  width: 300px;
  height: 100px;
  padding: 20px;
  background-color: #f3f3f3;
  border: 1px solid #dddddd;
  border-radius: 3px;
}

.subtotal__gift {
  display: flex;
  align-items: center;
}

.subtotal__gift > input {
  margin-right: 5px;
}

.subtotal > button {
  background: #f0c14b;
  border-radius: 2px;
  width: 100%;
  height: 30px;
  border: 1px solid;
  margin-top: 10px;
  border-color: #a88734 #9c7e31 #846a29;
  color: #111;
}
The Subtotal component is just basically calculating the total and showing it. Now let’s make the main parent component Checkout. We just have to place the two components we just made.
So let’s go ahead and edit Checkout.js
import React from "react";
import "./Checkout.css";
import Subtotal from "./Subtotal";
import { useStateValue } from "./StateProvider";
import CheckoutProduct from "./CheckoutProduct";

function Checkout() {
  const [{ basket, user }, dispatch] = useStateValue();

  return (
    <div className="checkout">
      <div className="checkout__left">
        <img
          className="checkout__ad"
          src="https://images-na.ssl-images-amazon.com/images/G/02/UK_CCMP/TM/OCC_Amazon1._CB423492668_.jpg"
          alt=""
        />

        <div>
          <h3>Hello, {user?.email}</h3>
          <h2 className="checkout__title">Your shopping Basket</h2>

          {basket.map(item => (
            <CheckoutProduct
              id={item.id}
              title={item.title}
              image={item.image}
              price={item.price}
              rating={item.rating}
            />
          ))}

        </div>
      </div>

      <div className="checkout__right">
        <Subtotal />
      </div>
    </div>
  );
}

export default Checkout;
This is pretty straightforward, it’s rendering out products from the basket and showing the subtotal of all the products.
Let’s go ahead and style this, let’s edit Checkout.css
.checkout {
  display: flex;
  padding: 20px;
  background-color: white;
  height: max-content;
}

.checkout__ad {
  width: 100%;
  margin-bottom: 10px;
}

.checkout__title {
  margin-right: 10px;
  padding: 10px;
  border-bottom: 1px solid lightgray;
}
That’s all, we have completed the AMAZON CLONE!! But we still have something remaining. What?
9. Deploy
To deploy a production version of the Amazon Clone, we need to set up Firebase hosting. So let’s go to console and type the command:
firebase init
- Select to use an existing project
- Type in the public directory to be “build”
- Allow to rewrite all URLs to index.html
After you do this, run in the console:
npm run build
This will basically ask React to build your app so that you can run this in production. After the build has completed, type this command to finally deploy the application on the internet!
firebase deploy
Once you’ve completed this, you should get an URL at the end of the process. This is the URL where your app is hosted online.
Congrats you just deployed your Amazon Clone on Firebase Hosting!!

